Desert Online General Trading LLC
Dubai, United Arab Emirates
Desert Online General Trading LLC
Dubai, United Arab Emirates


🔥 Elevate your Raspberry Pi game with touch, clarity, and cool precision! 🖥️
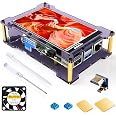
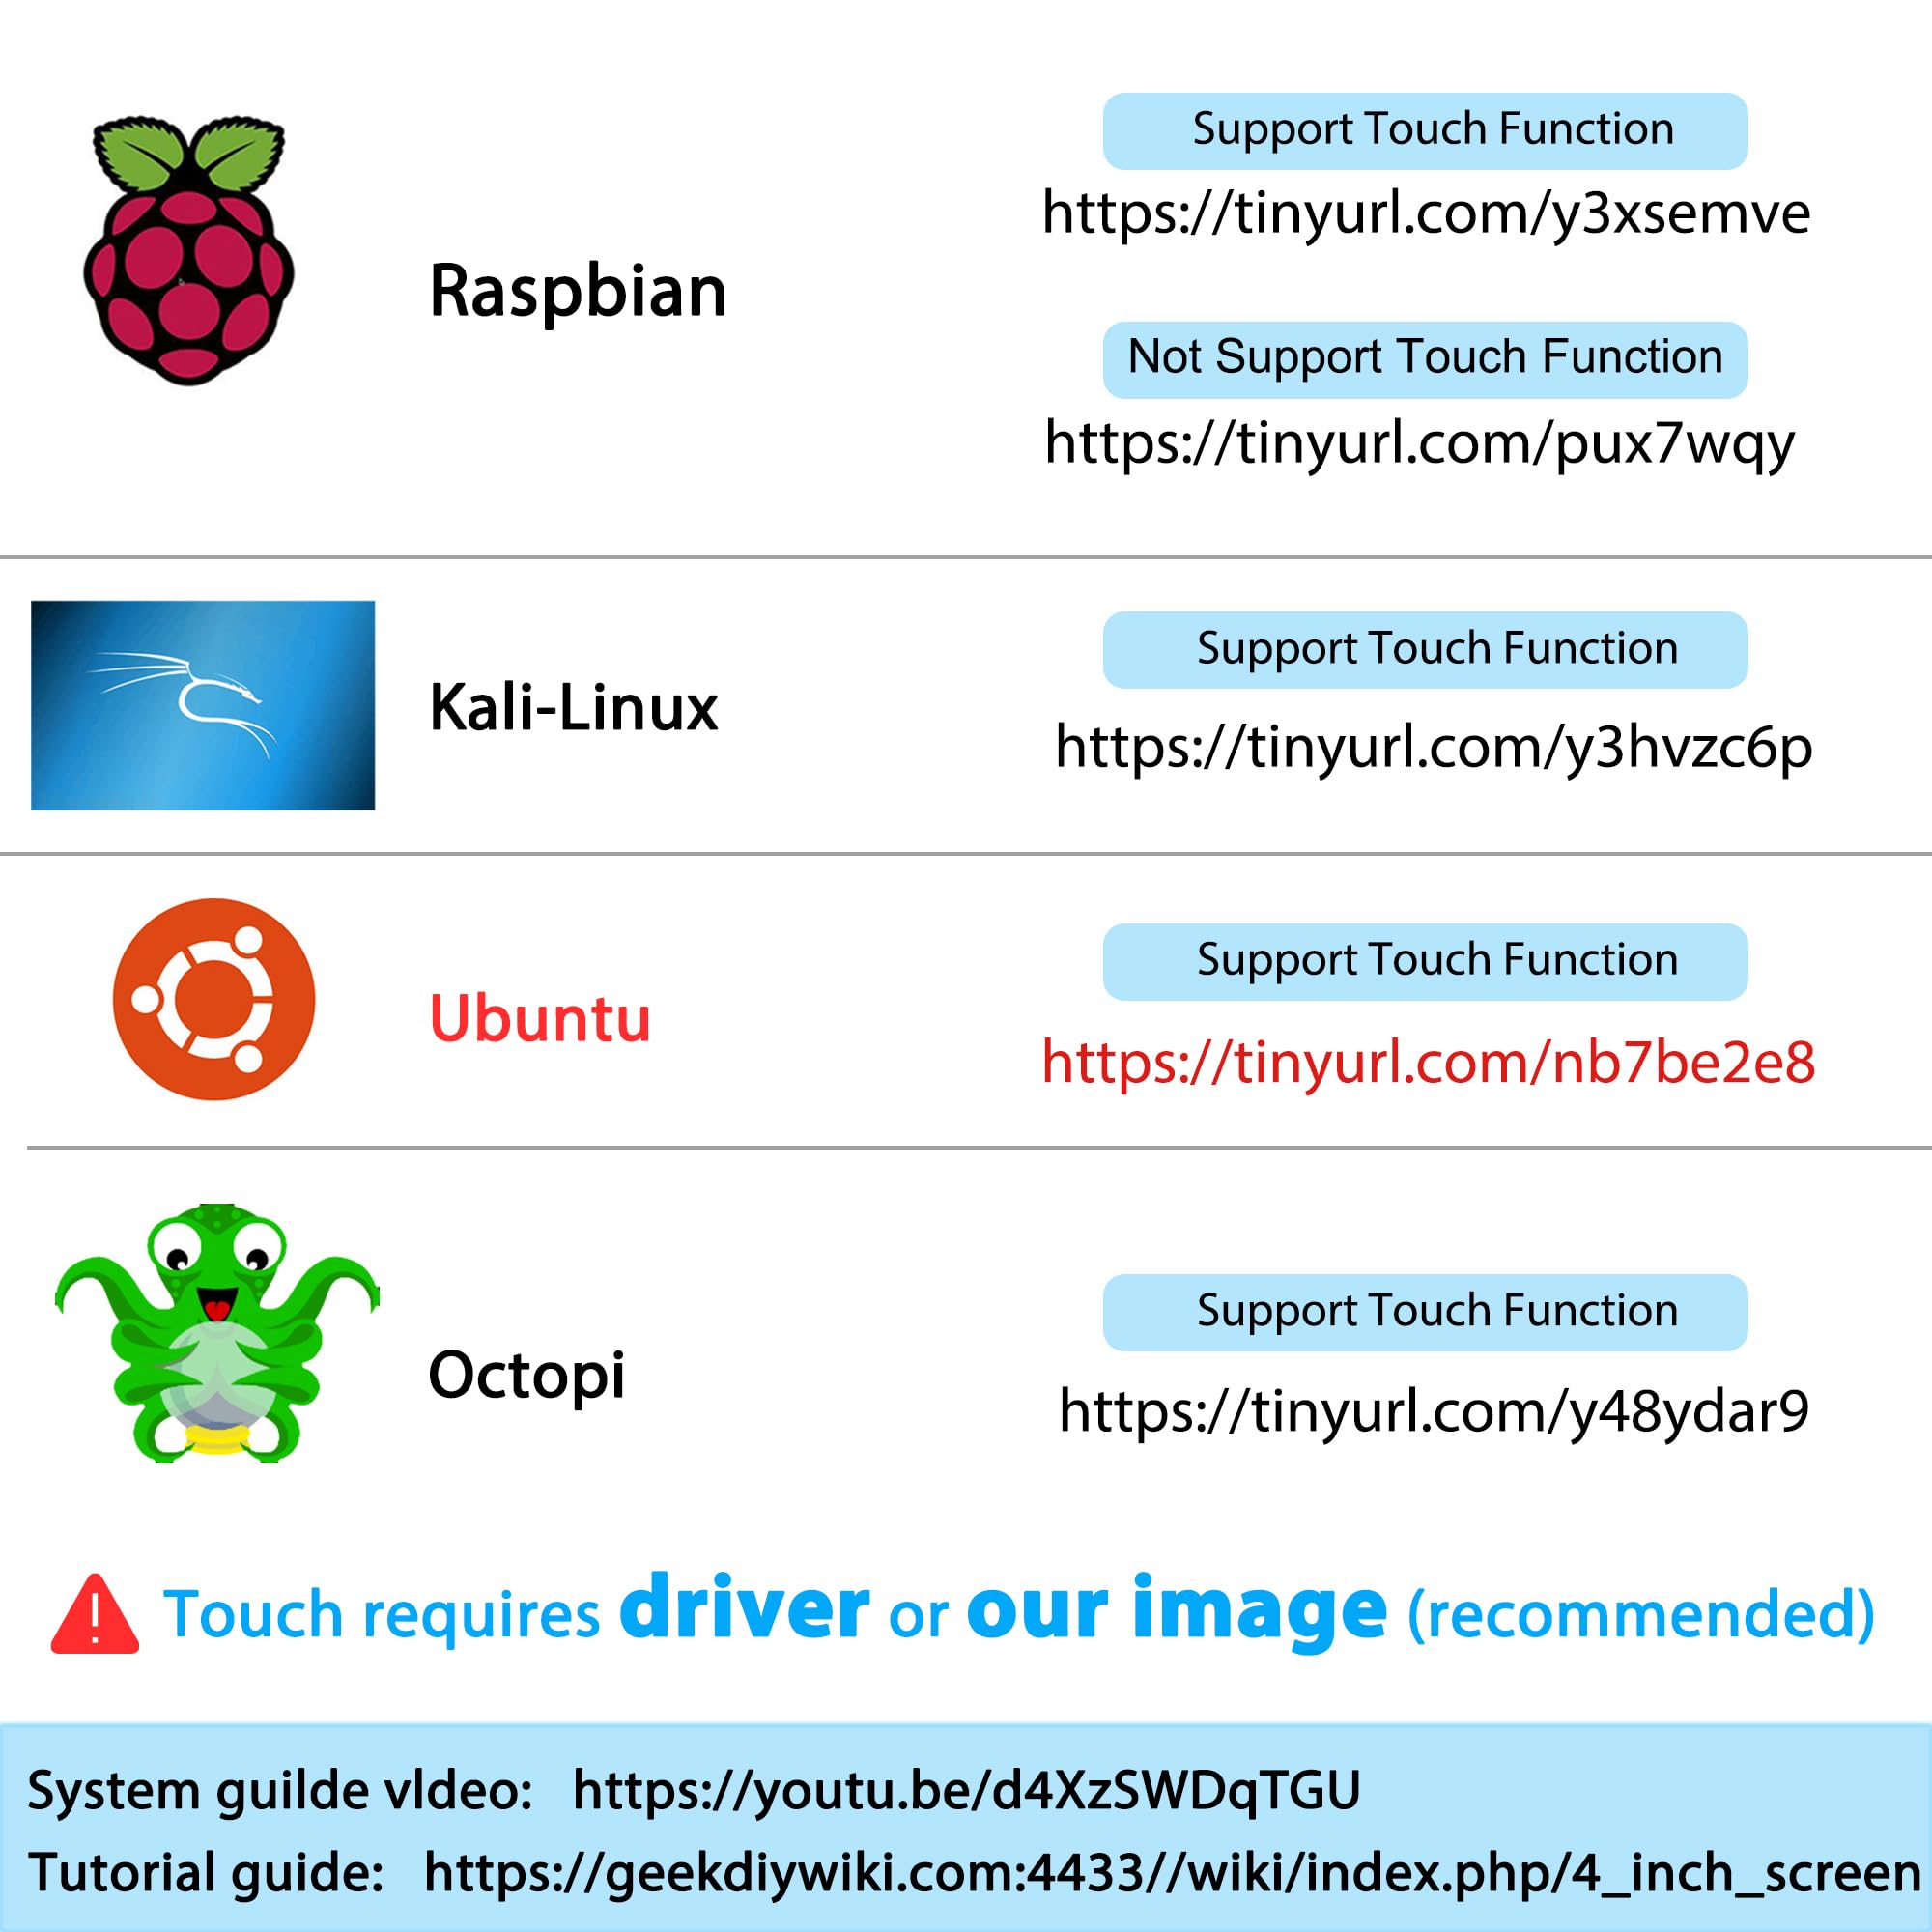
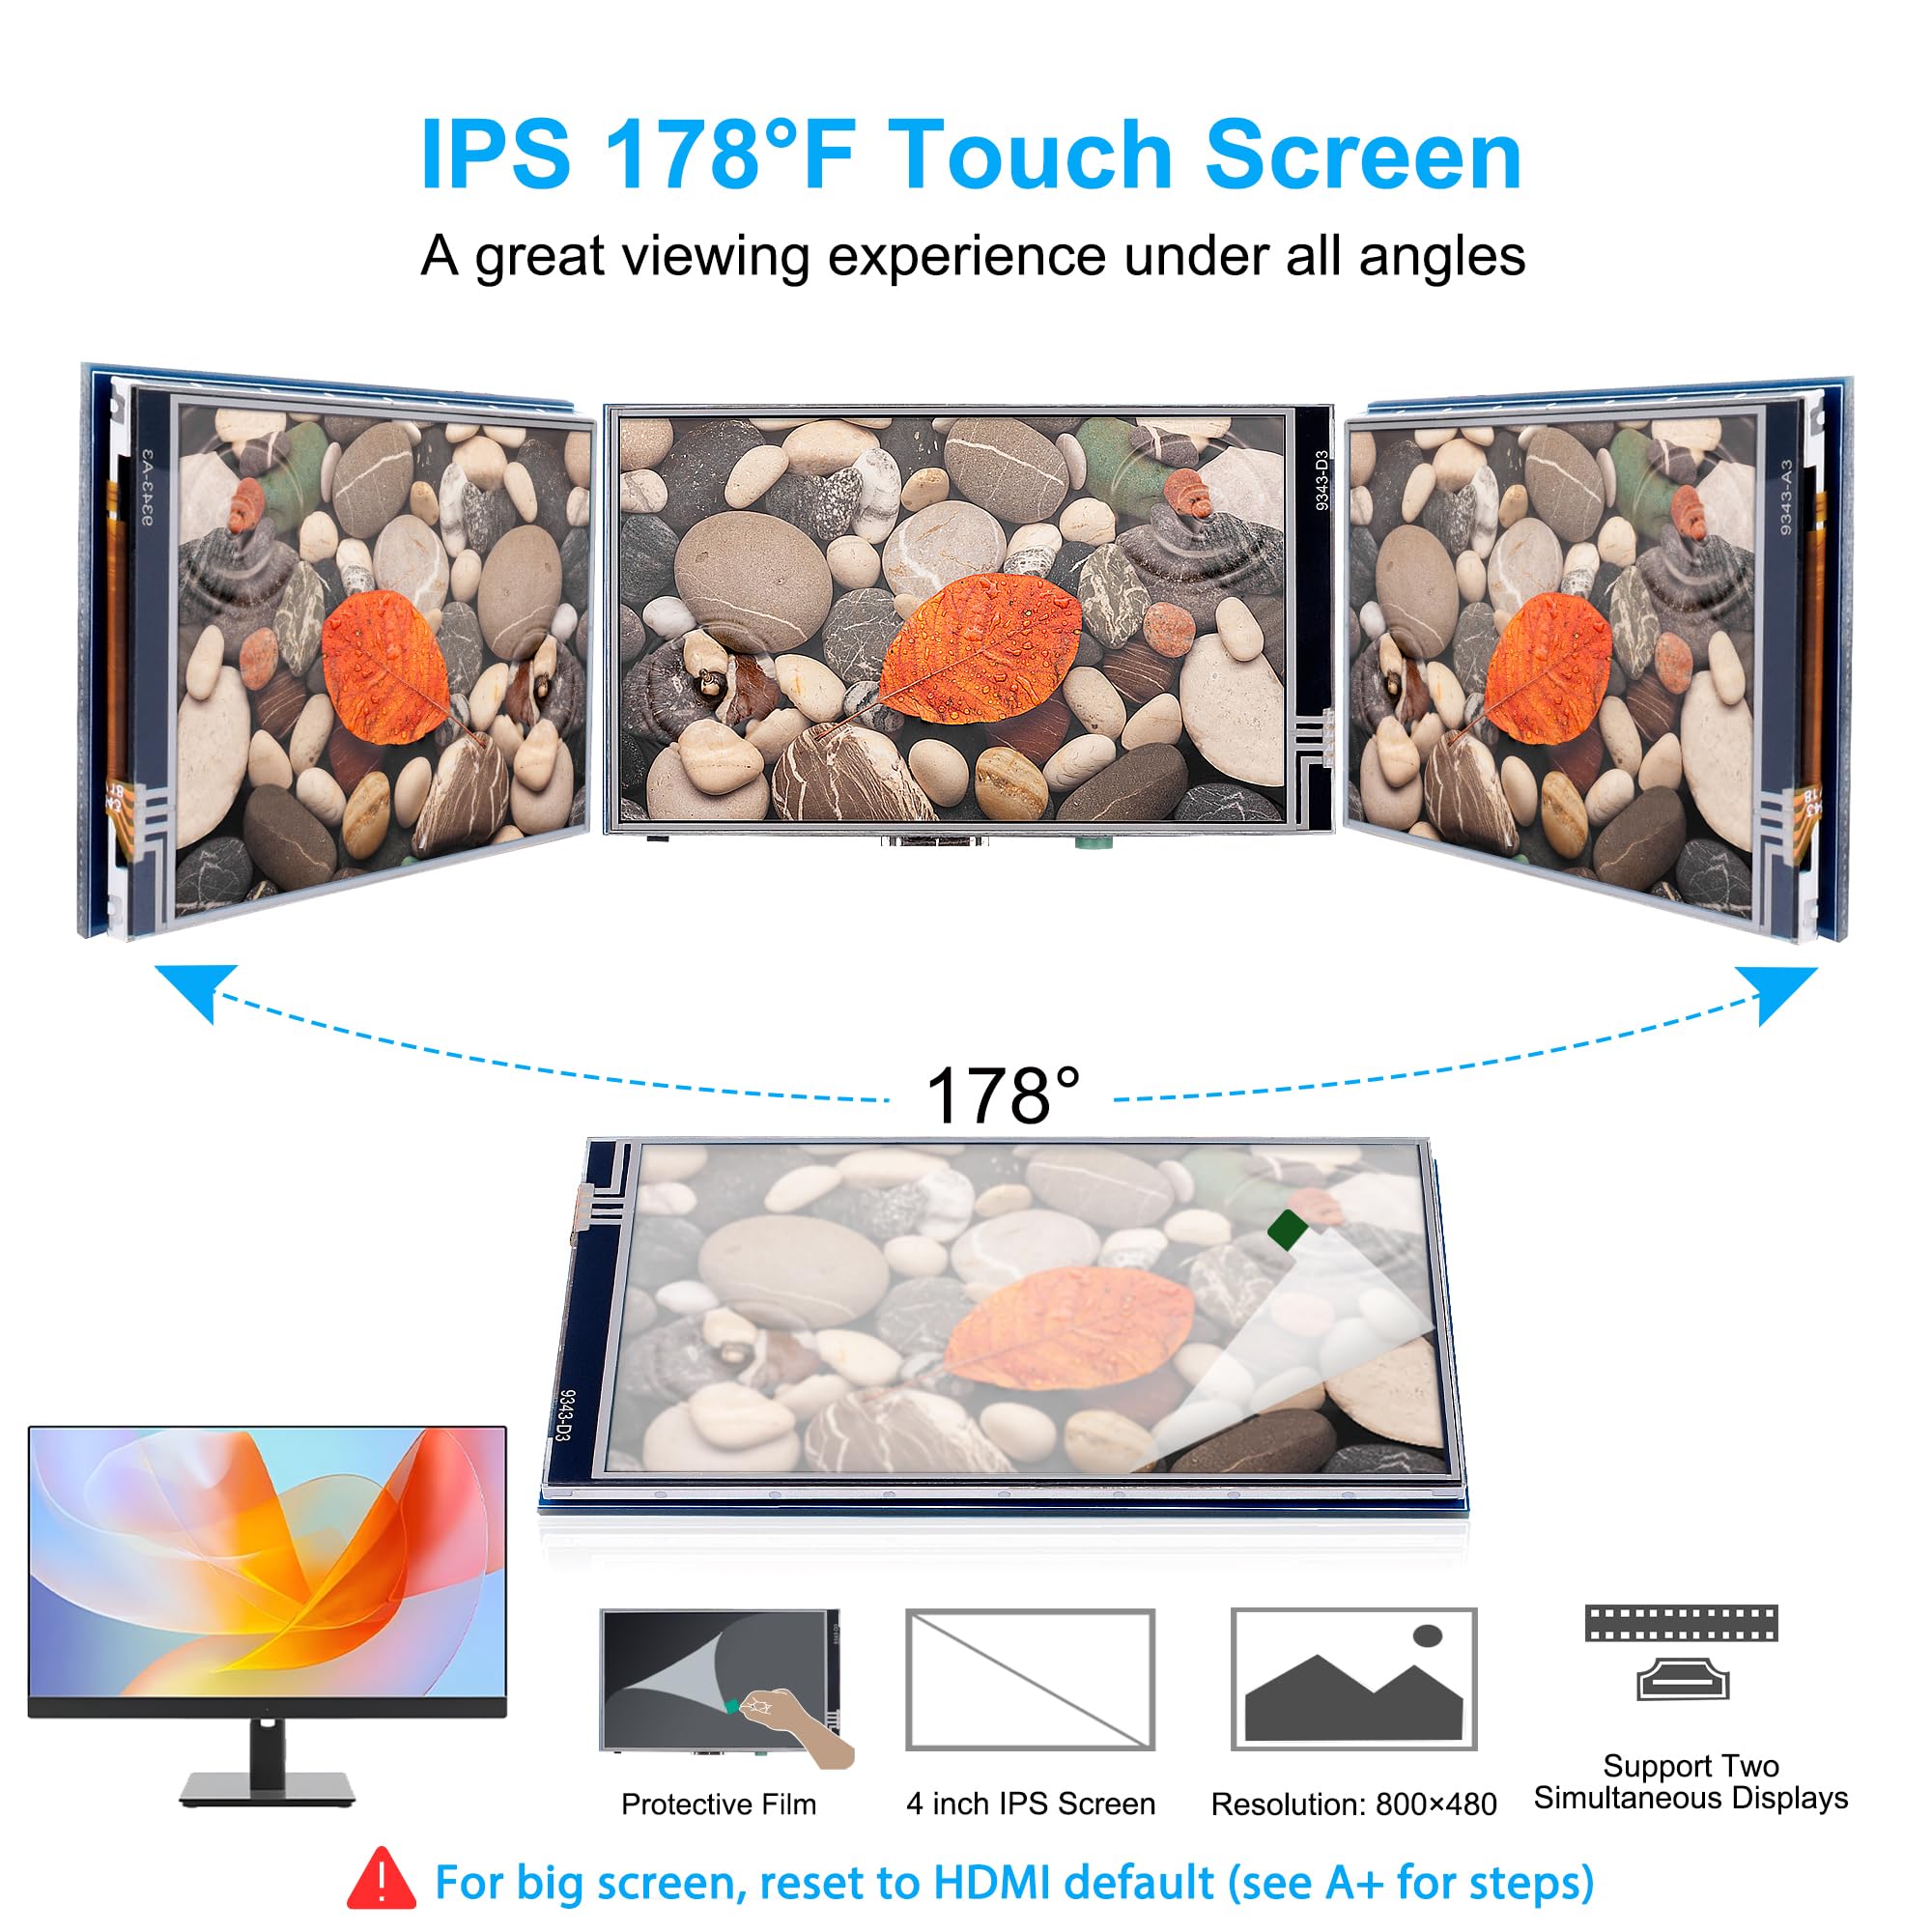
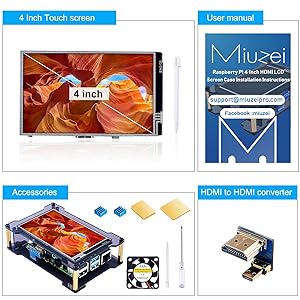
The Miuzei 4-inch IPS touchscreen is a compact, high-performance display designed for Raspberry Pi 4B models and other HDMI devices. Featuring 800x480 resolution, 60Hz refresh rate, and a wide 178° viewing angle, it supports multi-system touch functionality (Raspbian, Kali, Ubuntu, Octopi). Equipped with a built-in cooling fan and heatsink, this all-in-one kit ensures optimal performance and durability for professional and hobbyist projects alike.


| Number of Component Outputs | 2 |
| Total USB 2.0 Ports | 1 |
| Total Usb Ports | 1 |
| Total Number of HDMI Ports | 2 |
| Processor Count | 1 |
| Display Resolution Maximum | 800*480 Pixels |
| Native Resolution | 800*480 |
| Resolution | 800 x 480 |
| Hardware Connectivity | Micro-HDMI, HDMI |
| Connectivity Technology | HDMI |
| Screen Size | 4 Inches |
| Voltage | 5 Volts |
| Is Electric | Yes |
| Viewing Angle | 178 Degrees |
| Has Color Screen | Yes |
| Refresh Rate | 60 Hz |
| Display Type | LCD |
| Display Technology | LCD |
| Aspect Ratio | 16:9 |
| Screen Finish | Flat |
| Warranty Type | Lifetime Warranty |
| Item Shape | Rectangular |
| Color | orange |
| Mount Type | Desk Mount |
| Compatible Devices | Raspberry Pi 4B 8GB/4GB/2GB, Orange Pi, devices with HDMI input, and systems including Kali, Raspbian, Ubuntu, and Octopi |
| Special Features | Touchscreen |
| Specific Uses For Product | Multimedia |
T**Y
Great kit, there are some great uses for this screen.
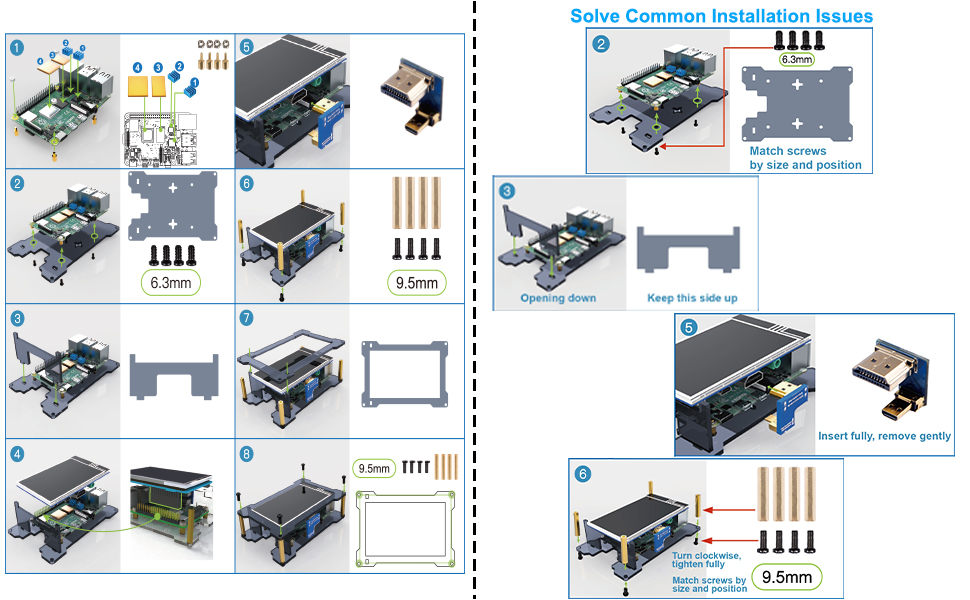
Most microcontrollers are used in a headless configuration, meaning once the initial configuration is done, there is little need for visual monitoring or feedback. However there are times when you need that monitor such as a network monitor, remote access (when there isn’t a wifi or computer to connect to), or portable applications (gaming, car ODB2, robots, etc.) This is when a small touch screen would come in handy.Hence the 4” Miuzei touch screen kit. It comes with a 800x400 touch screen, pen, HDMI “jumper”, four head sinks, 3 black acrylic pieces for a supporting case and mounting hardware. Assembly was very easy. The screen sits on the Ethernet/USB 3 ports and one of the acrylic pieces. A small HDMI jumper connects the HDMI full size port to the first HDMI mini on the Pi4. There is a small button that is used to control the backlight.I wanted to see how fresh install would be so using the website provided on the instruction card, so I downloaded the new Raspbian Buster with the touch screen driver already installed. After booting up the screen came up and I was able to use the pen on the screen. No issues what so ever. A few clicks later after configuring for WiFi, time zone, and keyboard, it was fully up and running. I would suggest that if you have something already up and running that you back up the image first before trying to install the driver. The screen is bright and viewable from almost all angles. You may have to run a pen calibration program depending far off the pen is from the contact of the screen.It should be noted that the screen can be used with any other device with an HDMI output. You will need an HDMI cable and a 5 volt USB power supplier to power the screen. Also the connector used for the touch screen uses 26 of the 40 GPIO pins.Being of the mind set of wanting to improve things, I can see three things that would be of benefit: 1) Adding a fan for cooling of the heat sinks and better air flow. 2) Access to the connector’s GPIO (if they aren’t used.) 3) A right angle header to have access to the other pins, including the 3.3 and 5.0 volt pins.This is a great kit. I like this a lot. It’s going to be used quite a bit. This really makes me want to build make a RetroPi game console, among other things.
N**H
Miles ahead of anything similar to form,fit or function. Pi5 compatible
Pictures are pi5 8gbI have bought similar minimalist touchscreen kits and by far this is the best you will get when it comes to overall quality. Not just the precision of the cut acrylic, but the hardware that they chose to include, the screen is very good despite what you read saying otherwise (it's 4 inches wide and $30, don't expect 4k resolution) but you will be able to read and do what ever is required with this screen.Another plus is it's a great case for passive cooling.Aesthetically, this thing looks so awesome with the transparent plastic/circuitry combo that I crave from my childhood inspired by Nintendo consoles and handhelds alike.The only negatives I have are that I can't turn the display off completely.Touch is inverted with the way I have it standing in my pictures which is how it will stay. (Which might be fixable but I'm just not smart enough to do that yet).If this is the kind of kit your looking for, buy this one.
E**7
This is how you add touchscreen without installing custom drivers
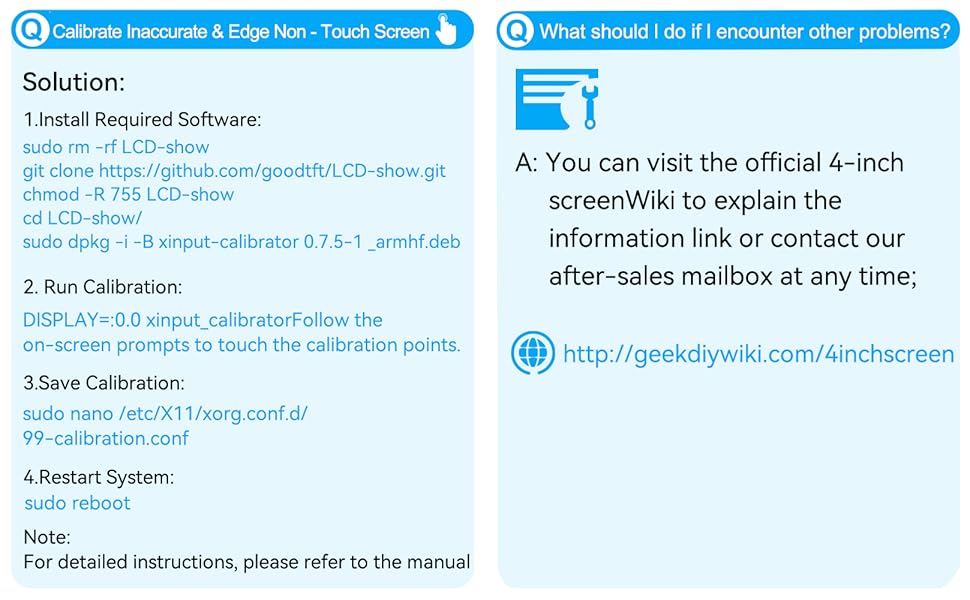
I got the RasPi 4b to run ham radio apps in the field. You don't need a screen on the RasPi to do this; connecting with a Remote Desktop App on your phone shows a full high res screen on the phone. But it gets kind of tricky to do when you're away from your home Wifi so I like to have a screen display. The IPS display is beautiful. I ding it for the screen blinking and needing to power cycle on reboots.Please notice that I've rotated the screen so that my Pi can stand up on it's case. The default is with the cables on the bottom. There's a setting in Preferences>Screen Configuration that allows you to change it to any of the four rotations. Right click on the screen, change the setting then click the check box. I'm not giving step by step instruction but I'll share where things are and what they are called. Hopefully that's enough for you to Google-fu all the info you need into the first page results of a search.Full support for the touchscreen is built into Raspian. There's one utility to add for calibration but that's all. There's no need to download anything from the seller. You will need to edit some system files. Once again, I'm just going to outline the process; hopefully knowing what things are called will allow you to quickly find the info that I did. Actual settings that I used are the picture, your settings for calibration and "TransformationMatrix" will vary.1) enable SPI from the Preferences>Raspberry Pi Configuration2) edit /boot/config.txt and add the dtoverlay line. Somewhere near the end will be safe and work.3) Reboot. At this time your touchscreen will be working but probably won't track you touch very well.4) find and install xinput_calibrator. Run it and copy the output into the "99" file as it suggests.5) The location of the xorg.conf.d directory where you have to create the "99" file will be in either /etc/X11 or, as in my case, /usr/lib/X11.6) I'm sure I tried every method of swapping are rotating the touchpad tracking (many more than twice) and found only one works in general. That is putting a TransformationMatrix statement near the end of the "99" file. The one I show is for the 180 degree rotation ("Invert" in the Screen Preferences app.) Search for "TransformationMatrix", ignore all results that try to teach you math and you'll find one that simply lists the answers for 0,90,180 and 270 degree rotations.I got frustrated with people posting this and that and "solutions" that they said worked once then didn't. Specifically searching for "ads7846", the touch controller on this display, I found answers and settings by kernel and X11 gurus. Hopefully, this will be enough to get you going or for a better writer than me to do a better write-up.Hope that helps,e7, aka aa2mz
Trustpilot
2 weeks ago
2 weeks ago